Beautiful art of many kinds was created by indigenous peoples, in the Americas, before the arrival of Columbus. Many pieces, because of their great age, are in need of professional conservation and restoration. This post explains the process of restoration of a badly damaged, 2000-year-old sculpture from the highlands of Western Mexico.
The steps in restoration are: examination & documentation, cleaning, and removal of old glue, gluing, filling gaps, painting, and sealing. Every effort is made to preserve the original features of the damaged art.
Pre-Columbian refers to the period in the Americas before the arrival of Columbus – an era that included numerous civilizations the most famous of which were the Maya, the Incas, and the Aztecs.
In the years 200 BCE to 400 CE sophisticated civilizations thrived in the highlands of Jalisco, Colima, and Nayarit in Western Mexico. In these ancient societies, figural sculptures were made as burial offerings and placed in underground tombs.
Our client (let’s call him Señor X) challenged the skill of Artistry in Glass bringing us the broken remains of a spectacular, 30 inches tall, seated figure who we nicknamed “Nayarit“. This post describes the history of the sculpture and the restoration methods that we employed.
History and provenance of Nayarit
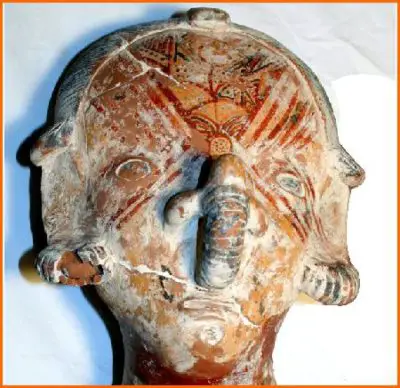
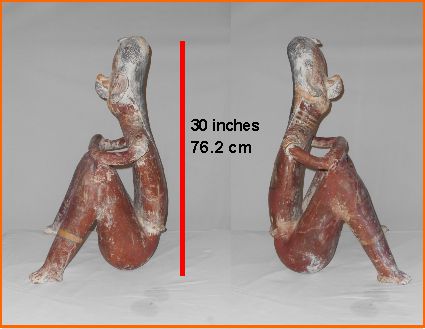
This 30-inch tall statue was one of a pair purchased from the estate of the well-known St Louis Department store magnate Morton May – a prolific collector of Meso-American and Polynesian indigenous art.
The price, at the mid-1980s auction, was $186,000 – a sum that reflected its rarity and status as one of the most highly treasured styles of artifacts from Highland Mexico. In perfect condition these days the value would certainly be in excess of $250,000.
Our research shows that the broken figure was likely from the Nayarit culture and dates from around 100 CE. In the auction document, it was described as Chinesco Type A, Lagunillas style (a sub-division of Nayarit).
This category of artifacts is mainly medium-sized depictions of human figures with broad flat faces and finely painted details. Our example has both nose and earrings and features colorful slip decorations in orange, red and brown.
(Not sure of the difference between BC and BCE?)
Artistry in Glass is an Amazon Associate – we earn a commission from qualifying purchases.
The tragic story behind the breakage
Señor X resides in an opulent home in Mexico City. The jewel in the crown of his newly remodeled mansion is the exquisite foyer with Grecian columns and a Carrera marble floor from Italy. To embellish this refurbished portico, Señor X displayed his priceless pre-Columbian sculptures, in subdued light, facing his luxurious beveled glass entry doors.

Señora X is shocked
All went well until his loving wife returned home after a strenuous day shopping at El Palacio de Hierro. She entered the dimly-lit foyer and was shocked and terrified by the spooky apparition of the two naked Meso-Americans.
After recovering her composure, Señora X issued an ultimatum: “Either these statues go – or I do!” Señor X immediately acted on his wife’s instructions picking up Nayarit by the protruding elbows ready to carry him into the safety of the library.

This lifting strategy proved very unwise. As if in slow motion, the elbows detached from the knees, and the sculpture began to fall.
In a frantic attempt at juggling, he found he did not have sufficient hands to grab the pieces as the figure crashed onto the marble floor disintegrating into a pile of rubble.
(Simultaneously corroborating both Newton’s theory of gravitation and the 2nd Law of Thermodynamics!)
The scope of the challenge facing Artistry in Glass
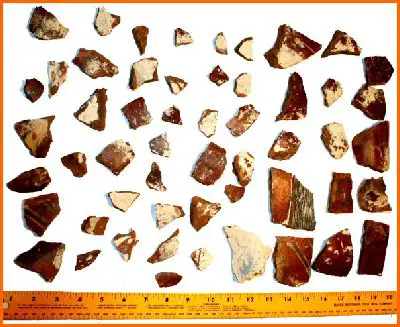
The sculpture had broken into at least 90 pieces of restorable size (> 2 cm) together with numerous smaller fragments.
Careful examination showed that the figure had a chequered past with at least three stages of repair before the latest debacle in Mexico City.
Ethical considerations & restoration procedures
The code of ethics for the restorer is the same whether the damaged object is a Mickey Mouse figurine or a priceless work of art and Artistry in Glass follows the guidelines established by professional bodies such as the American Institute for Conservation (AIC).
In museums and art galleries an important general directive is to make restorations reversible and not to disguise damage by over-enthusiastic painting. However, in this case, we departed from this strict policy under the instructions of the customer because the damage was so severe that filling and repainting were justified for esthetic reasons.
Steps in the restoration process
- Examination & documentation
- Cleaning & removing old adhesive
- Gluing pieces together
- Filling cracks and gaps
- Painting and sealing
Examination & documentation
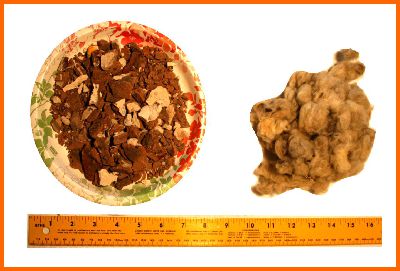
Careful visual and microscopic examination was carried out to determine the nature of the material, the surface painting, and the extent of previous repairs. For convenience, we divided the fragments into large, medium, and small and took photographs of each category.
The material is terracotta-colored clay pottery fired at low temperatures (600 to 950 degrees C). The sculpture is hollow – with an opening at the top of the head (presumably to vent hot air during firing). Loose wooly material was found in the wreckage.
The pottery is porous and covered with a red-brown “slip” – a covering of smooth red clay that was polished before firing. Finally, painting in orange-red and brown was used to decorate the face, neck, and other parts of the body.
We found evidence of at least 3 stages of repair with early cracks filled with white plaster, later cracks repaired with epoxy, and a final (ill-judged) repair stage using original Gorilla Glue (below).
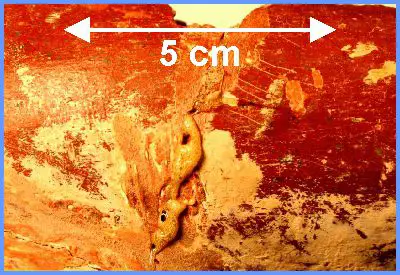
Ill-advised repair using polyurethane Gorilla glue
This extremely strong and aggressive adhesive expands in the presence of water and swells to fill gaps. It is most unsuitable for fine restoration work and had to be laboriously removed with blades and scalpels.
Cleaning & removing old adhesive
The pottery is porous so it is not possible to use liquids to dissolve the old adhesives. So glue was removed mechanically with scalpels and blades. An early generation of plaster filling was generally left intact.
Gluing pieces together
The recommended adhesives for porous clay pottery are acrylic polymer glue, water-soluble wood glue, and a cellulose nitrate adhesive like Duco cement (see here on Amazon). Following instructions from the customer to create strong adhesion, we used Titebond, a water-soluble wood glue. This is preferred to epoxy because it is absorbed slightly into the porous pottery.
Gluing strategy

The problem is essentially a complex three-dimensional jigsaw puzzle that is solved in the usual way by patiently matching shapes and surface decoration, starting with large pieces. An important precaution is to plan ahead so you do not “lock yourself out” leaving a final fragment that cannot be inserted.
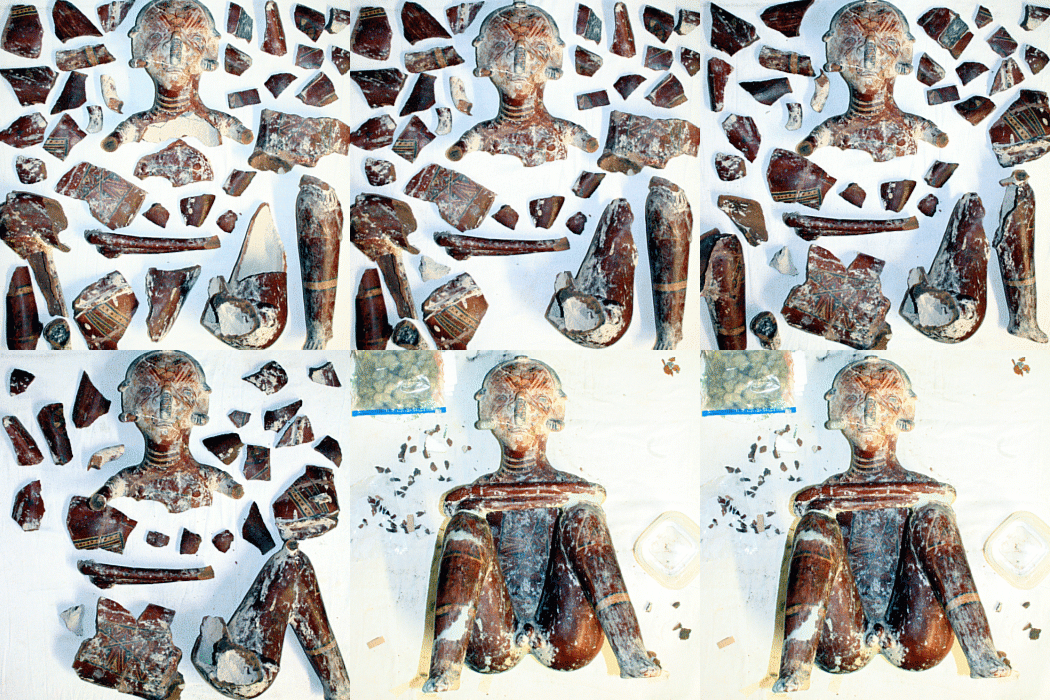
Timelapse of gluing sequence
The key to gluing multiple pieces is not to use too much glue because if you do the repair will gradually expand in size and later pieces will not fit. So a minimum amount of wood glue was used.
As the sculpture is hollow, rubbery Duco cement was applied to the inside surfaces to create a strong overlapping bond that is invisible from the outside.
Recommended adhesives for porous pottery

Duco cement is a cellulose nitrate adhesive available here from Amazon. Fast-drying and clear – not as strong as epoxy but very effective on the inside surface of this porous sculpture.
Filling cracks and gaps
The serious nature of the damage meant that there were numerous small gaps and cracks left after the gluing. These were filled with Polyfilla, a type of cellulose-modified gypsum. Polyfilla has more body than regular plaster of Paris making it easier to model with spatula-like tools.
Polyfilla
Recommended for low-fired archaeological pottery we use Polyfilla, sometimes applied over a support mesh. Polyfilla (available here on Amazon) has several beneficial properties amongst which are reasonable coherence and small shrinkage on drying. Unfortunately, Polyfilla takes quite a while to dry so, for thick areas, it is generally better to use two thinner coats.
Spatulas (also called steel chisel sets) are very useful for squidging plaster or putty into cracks. Using a spatula, force the putty into the crack and smooth the surface as level and even as possible. The smoother you get the Polyfilla, the less you will have to sand off when it is hard.
Tinting the Polyfilla: a very convenient method of color matching is to add natural artist’s pigments to the Polyfilla (or plaster of Paris). We use a combination of burnt umber, yellow ochre, and burnt sienna to create a colored fill that closely matches Nayarit’s body.
The sienna pigment collection (from Amazon) – contains natural sienna, light sienna, and burnt sienna, a convenient selection enabling you to match natural clay pottery. Interestingly, these mineral pigments, obtained from natural earths, ochres, and oxides, are exactly the same materials used by the original potters 2000 years ago.
After the plaster filling has dried, it is sanded and polished flush to the surface. Sometimes repeat applications are needed to complete the filling of small holes.
Painting and sealing
The last stage of restoration is painting and sealing the surface. We used carefully tinted Polyfilla to match the body color but followed up with minor touch-up painting {using water-soluble acrylic paints) to improve the aesthetics of the geometric linear painting, especially on the face.
Finally, the integrity of the crumbly surface was safeguarded by sealing the paint and plaster with semi-gloss spray varnish. See this marble repair post for similar painting techniques,
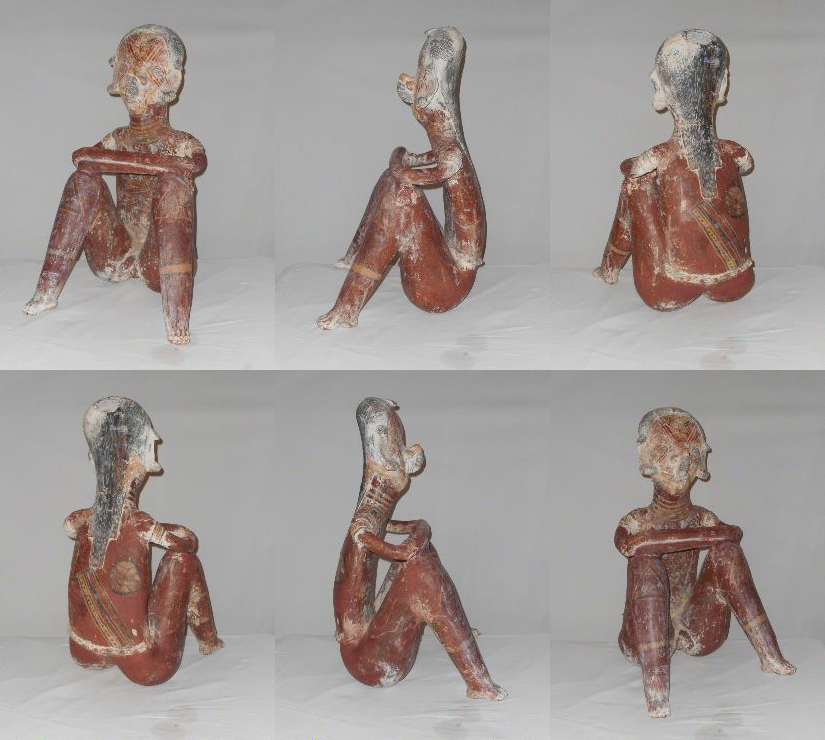
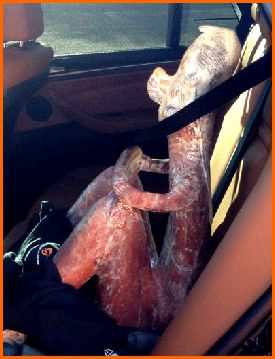

Another repair by Artistry in Glass: Meso American ballplayer Ameca-Etzatlán style 100 BCE – 300 CE. Decapitated head is re-attached by Artistry in Glass with minor cosmetic filling of micro-chips and painting with natural ochre pigments.
What is the difference between BC and BCE?
BCE/CE usually refers to the Common Era (the years are the same as AD/BC). That is, BC is usually understood to mean “Before the Common Era” and CE to mean “Common Era,” though it is possible to reinterpret the abbreviations as “Christian Era.”
The simplest reason for using BCE/CE as opposed to AD/BC is to avoid reference to Christianity and, in particular, to avoid naming Christ as Lord (BC/AD: Before Christ/In the year of our Lord). Wikipedia, Anno Domini article:
The Second Law of Thermodynamics
The second law of thermodynamics says that when energy changes from one form to another form, or matter moves freely, entropy (disorder) in a closed system increases.
The disintegration of Nayarit, from an ordered sculpture into a disordered heap of 100 fragments, is a great example of the 2nd law.
Possibly the most famous 2000-year-old man
We cannot leave this interesting post without acknowledging the most famous 2000-year-old man – the immortal character created by Mel Brooks and Carl Reiner. The foundation for the routine was laid during the production of Your Show of Shows, where Reiner was an actor and Brooks was a writer.
Artistry in Glass: your source for antique repair in Tucson
Check out these informative articles:-
- Where can I get antiques repaired?
- Are broken antiques worth fixing?
- How to fix a broken picture frame
- How to repair a broken china plate
- How to repair a broken china teapot
- How to fix a broken marble slab
- How to repair a broken china coffee mug
- How to repair a 2000-year-old sculpture
- All about repairing stained-glass lampshades
- How to care for your stained glass skylight
- How to repair Dalle de Verre
- Is stained glass worth repairing?
- To repair or toss out?
- What to do with broken antiques
- Is lead crystal dangerous?
- Repairing an antique Mexican statue
- Repairing religious statues
- The history of Swarovski crystal figurines
- How to find the value of a Swarovski Crystal figurine
- Have Swarovski figurines lost value since 2009?
- How to collect Swarovski annual ornaments
- How to display Swarovski crystal figurines
- How to authenticate a Swarovski crystal figurine
- How to display Swarovski annual ornaments
- How to clean Swarovski crystal figurines
- How to repair a Swarovski crystal mouse
- How to repair a Swarovski annual ornament
- How to repair a Swarovski crystal train set
- Fixing broken wine glass stems
- How to clean cloudy glasses
- Why do wine glasses have stems?
- Swarovski Crystal Figurines
- How to repair a chip in a wine glass
- How to fix a scratched glass tabletop
- How to replace a broken patio tabletop
Glass safety – learn from the experts!
- Choosing between tempered & laminated glass
- Broken glass injuries and how to avoid them
- Is wired glass safe?
- What is safety glass?
- What is tempered glass?
- What is Gorilla Glass?
- Plexiglass vs glass
- Should glass shelves be tempered?
- Should glass tabletops be tempered?
- Is lead crystal dangerous?
- Is leaded (stained) glass dangerous?
- How to repair cracked stained glass


