Large frameless wall mirrors are a feature of home gyms, dance studios, and residential bathrooms. For safe installation, it is essential to use mechanical fasteners (J-channel and clips) in addition to adhesive (mirror mastic). Follow these four simple steps for the safest and best results.

Safety must be paramount when installing large wall mirrors. Learn from the cautionary tale below that all large mirror must be installed with mechanical fasteners as well as mastic – otherwise serious injury or even death could result.
As an Amazon Associate, I earn from qualifying purchases.
What are the dangers of faulty mirror installation?
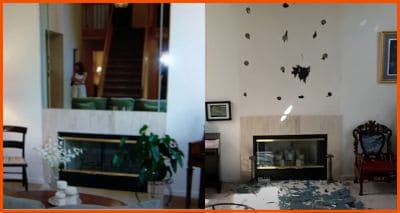
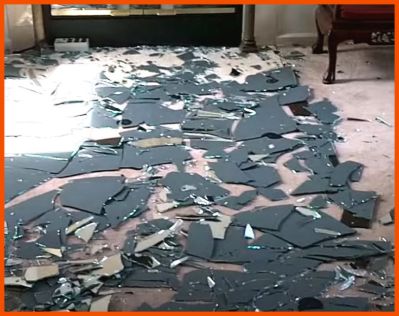
A large decorative mirror about 4 feet by 8 feet was glued to the wall with mastic above a fireplace in this California residence. The homeowners returned home one afternoon to discover the 100 lb mirror in dangerous shards on the living room floor. Forensic investigation indicates that the blobs of black mastic were not squished flat as the mirror was placed against the wall, possibly because the mirror was tightly jammed between the fireplace marble and the ceiling. The residents were extremely fortunate not to have been home at the time of the mirror detachment.
For the secure installation of wall mirrors, it is essential to use mechanical fastenings (J-channel at the base and clips at the top) in addition to adhesive (mirror mastic). The safety of your family is at stake – always consult a licensed professional if you are in any doubt.
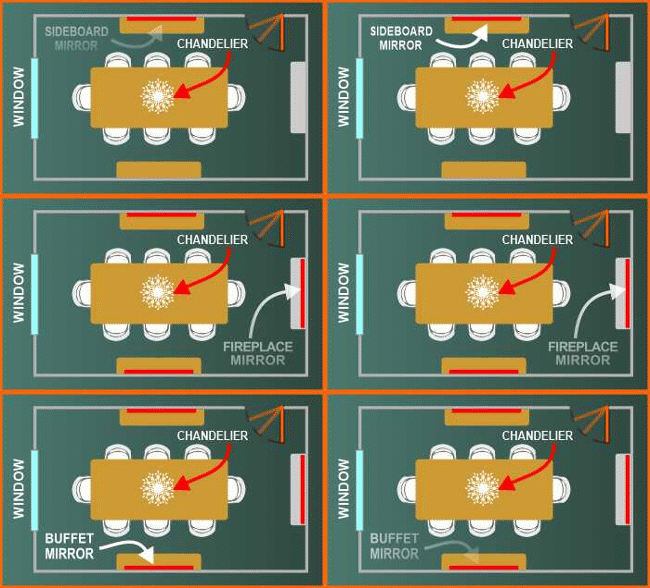
Two positions for dining room mirrors
For traditional dining rooms, the two best positions for wall mirrors are either opposite the sides of the table (you choose the wall) or at the head of the table. Use this page for more info.
1) Measure the walls and order mirrors
Careful measurement is important for planning your wall mirrors. Follow these tips:
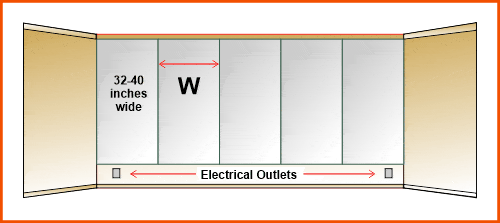
Size and weight of mirrors – avoid very large mirrors
1/4″ thick mirror (recommended for walls) is a heavy material: a 72″ tall by 40″ wide panel weighs 68 lbs. In view of this weight, we recommend that the homeowner avoid extremely large (greater than 48″ wide) mirrors because they are difficult to handle. The other disadvantage with very large mirrors is that, if the wall is not perfectly flat, the mirror may bend slightly creating a distorted, fairground mirror effect.
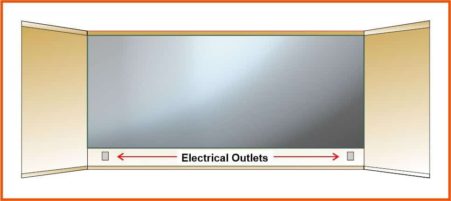
Position of wall mirrors – raise up above outlets
It is expensive to cut holes in a mirror so it’s preferable to avoid notches and cut-outs if possible – not only because of the extra cost ($100 + per socket) but also because they have to be measured and located very accurately. For this reason, it’s often easier just to raise your mirrors up the wall above electrical sockets. In home gyms, this will also be a safety measure – in the event that weights may crash against the wall. Accidental cracking of the mirror is also the best reason for using mastic as well as fasteners. If the mirror is smashed by accident, the mastic will hold the broken shards to the wall minimizing the chances of serious injury.
Edgework for wall mirrors – choose “flat polished”

When a sheet of mirror is, cut the edge is razor-sharp and it has to be worked on to make it safe. In the glass business “edgework” is the name given to the fabrication process applied to the edges of glass after it is cut. By far the best edgework for wall mirrors is called “Flat Polished” – a polished edge at 90 degrees to the glass surface, and with 45-degree chamfers (called arrises) to remove the sharpness. Seamed edges would be OK if you have a desperate need to economize but the slightly irregular edges look offensive to the educated eye. Beveled mirrors are only suitable for stand-alone applications.
Learn “glass-speak” to get the best prices
Follow the advice below to get favorable pricing from your glass & mirror retailer. (for best results, speak in a gruff, contractor-style voice!)

To save a little on the edgework charges ask for the bottom edge to be seamed instead of polished (this edge will be hidden inside a J-channel and will not show). So your request to the glass company (using glass-speak) should go like this: “I would like your best price on 3, 1/4″ clear mirrors 40″ * 72″, each one with 3 flat polished edges and with one short edge seamed“.
2) Prepare the wall for mastic
Wall mirrors are attached using a special adhesive called “mastic” that is specially formulated so that it does not damage the silvering on the back of the mirror.
What is mirror mastic?
The word “mastic” has broadened its usage to refer to any adhesive used to attach mirrors but originally referred to a black, sticky substance made mainly from petroleum resins separated during the refining of crude oil. Mastic has the consistency of molasses and the appearance and smell of tar.
Mastic is available in gallon and 5-gallon containers used by professionals for installing large numbers of mirrors, and in handier cartridges dispensed from a caulking gun that are much more convenient for the homeowner and for hanging a few small mirrors.
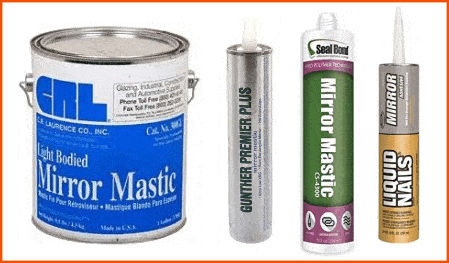
The important property of all mirror mastics (both black and tarry and the newer acrylic adhesives) is that they are guaranteed safe to use on mirrors because they will not attack the silvering. The main benefit of buying a tub of black mastic is that it is about 10 times cheaper than the smaller volume cartridges and therefore favored by professional glass companies. Homeowners, however, sometimes complain about the unpleasant smell of black mastic that can persist for 24 to 48 hours as the adhesive sets up.
The detailed instructions for applying mastic depend on the type of wall. Surfaces such as vitreous brick, glazed tile, glass, clean metal, or porcelain do not need to be primed – mastic will stick directly providing the surfaces are clean. Unfinished wood should be primed (see primers below) and painted wood should be sanded down and primed. Concrete, brick, or cement walls should be clean, dry, and free from paint and then primed.
Preparing drywall for applying mastic
Follow these steps to ensure a secure attachment to drywall:
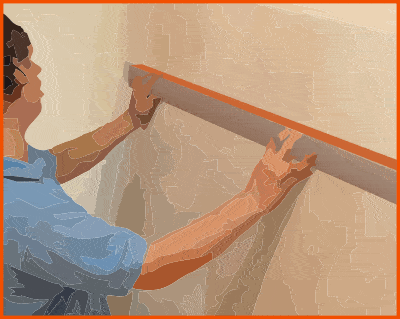
Using a straight board, test the wall surface to see if it is bowed, warped, bumpy, or uneven. Professional black mastic can be used to “build-out” the wall to take account of differences of up to 2 inches in extreme cases.
Pay particular attention to the lower part of the wall above the baseboard, because if you are using the recommended J-channel it is very important that it is not bent because the inflexible 1/4″ thick mirror will not fit into a warped channel.
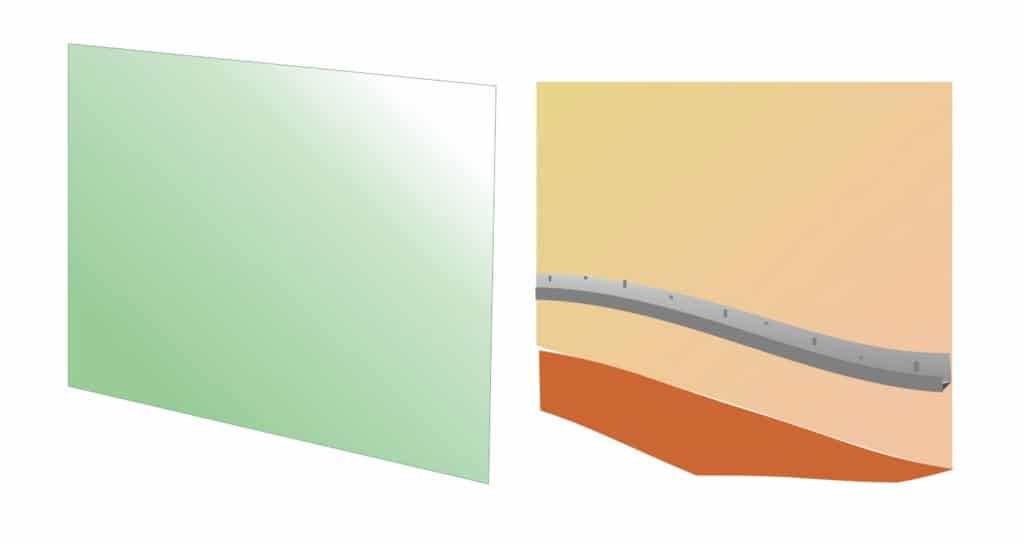
Avoid a warped J-channel
Rigid sheets of 1/4″ thick mirror will not fit into warped or bent J-channel
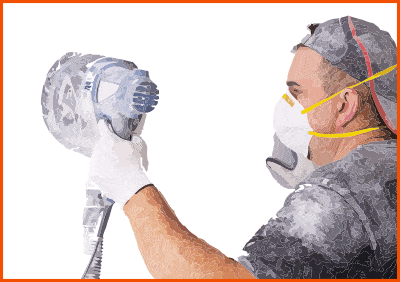
Sanding the drywall
Using a safety mask or respirator sand the drywall in preparation for painting with primer. Mastic will not stick to paint or wallpaper so these must be removed.
Mastic is sufficiently flexible and gooey to fill gaps but big bumps and irregularities should be smoothed down.
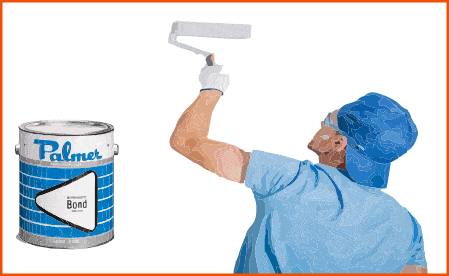
Priming the drywall
Use a drywall primer like this example from Kilz available on Amazon or a specialized primer from Palmer or Gunther to provide a professionally sealed drywall surface for the best adhesion of mirror mastic. The security of the installation depends entirely on the bond between the mastic and the wall so do not neglect this important step.
3) Install J-channel and clips
Remembering that it is essential to use mechanical fasteners as well as mastic – it is now time to install the J-channel to support the mirror and the clips to hold the mirror against the wall.
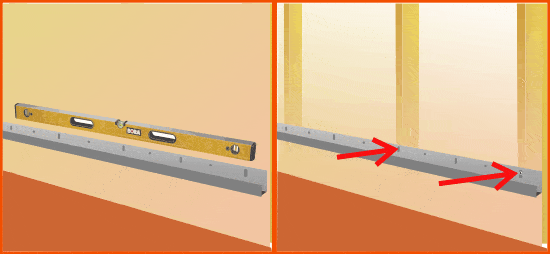
Anodized aluminum J-Channel
J-channel for 1/4″ thick mirror comes in numerous finishes including brushed nickel (pictured above left), chrome, satin chrome and black. It is available in 12 foot lengths: note that in order to ship by UPS it has to be cut to fit into the shipping tubes. The vendor will advise you to request the cut lengths that you require.
Position the J-channel at the desired height (preferably above electrical outlets), make sure it is level, and then attach it with fasteners preferably screwed in wooden studs. (Click here to learn about finding studs). Remember, the lower edge of the mirror will be concealed in the channel – so you can economize slightly by asking the glass company to seam this edge rather than polishing it.
CRL Nickel-plated mirror clips
There are numerous types of mirror clips available on Amazon. These pictured above/ left have a simple clip mechanism that allows the sliding top section to be pushed down after the mirror is put in place, Although all the weight is taken up by the J-channel, it is still a good idea to screw the clips into wooden studs for extra security
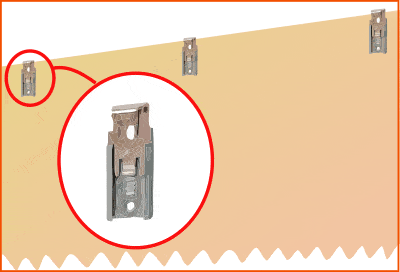
Attach top clips to wall
Measure carefully up from the J-channel, to establish the top of the mirror. Making allowance for the sllding top clip mechanism, position the mirror clips on the wall and secure them (preferably to studs).
Always place the top clips slightly higher than exactly necessary because you can always put rubber shims into the J-channel to move the mirror up if necessary,
Step 4a – do a dry run to check the mirror positions
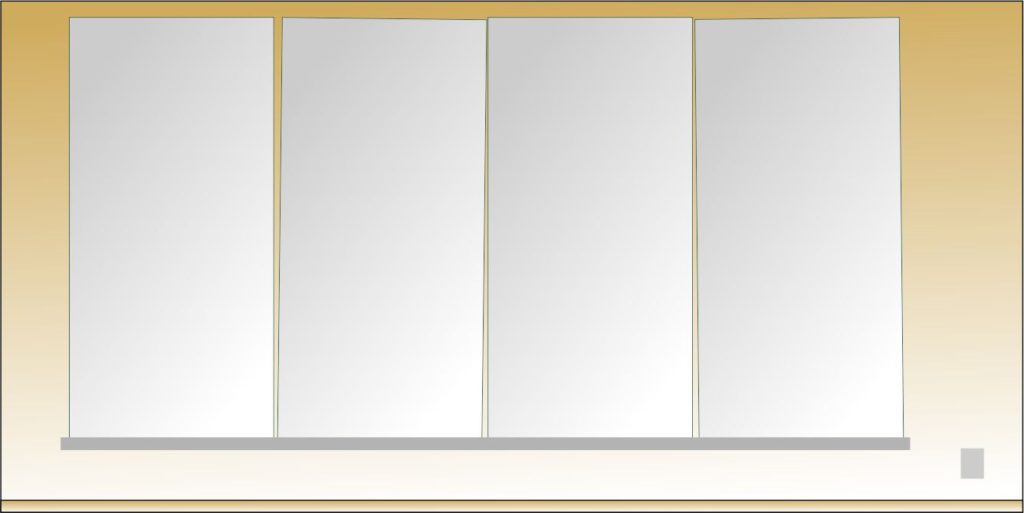
If you are installing a wall of mirrors – that is two, three or more, it is wise to do a dry run to check that the mirrors line up correctly, before applying the mastic.
Clear plastic setting blocks
It is very important that the vertical seams between adjacent mirrors are perfect, with no gaps. If the channel is slightly out of level it is possible to compensate by skillful shimming of selected parts of the mirrors, using setting blocks such as those pictured above/ left – to get them completely lined up.
Sidebar: preventing “Black-edge”
If your mirror is situated in an area of high humidity it is wise to take precautions and protect the mirror edge against de-silvering and the development of ugly “black-edge”.
Use mirror-edge sealant to prevent “black-edge”
A valuable safeguard for glass/mirror professionals, edge sealant protects edges from blackening on existing and newly cut mirrors. Reduces silver deterioration which results from handling, humidity, moisture or storage. Easy to use; dries in minutes.
4) Apply mastic and install mirrors
Having checked to be sure the mirrors fit into their channel and are lined up, it is time to apply the mastic to the back of the mirror. For best adhesion, the mirror, substrate, and mastic should be at room temperature (72°F, 22°C).
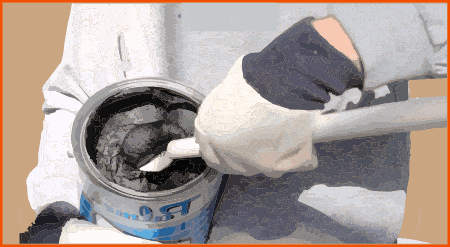
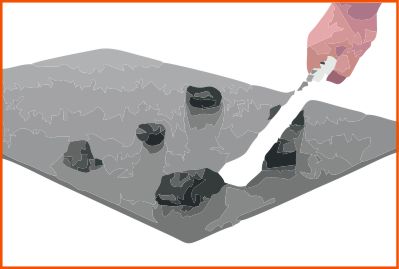
Apply the mastic to the mirror or substrate in a minimum of two (2) golf ball-size mounds for every square foot of the mirror. To avoid “squeeze out”, don’t apply the mastic too close to the edge. Place the mounds or splodges so that space will be left between them when the mirror is installed. Each scoop or splodge will spread out to a “pat” about 4 inches in diameter when the mirror is pressed in place.
Applying adhesive from a cartridge
In recent years sticky black mastic has been succeeded by acrylic adhesive products that are “gunnable” from a regular caulking gun. This makes the application much easier for the homeowner. A further benefit is that these new adhesives are VOC compliant. This means they have no volatile organic compounds – gases with short- and long-term adverse health effects that are components of petroleum fuels and other fluids. The disadvantage of cartridges is that the glue is much more expensive than traditional mastic.
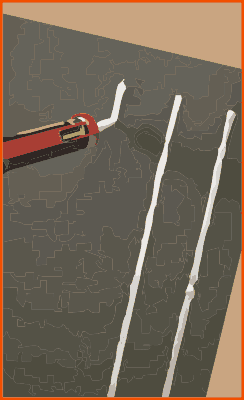
Applying Acrylic Adhesive
The adhesive should be applied in vertical beads the full length of the mirror, five to six inches apart. Allow three inches from the mirror edge to begin or end a bead to avoid “squeeze-out”. Applying 4 to 5 inch diameter pads for every square foot of mirror is also acceptable.
Vertical strips allow the adhesive to setup quicker because moisture can evaporate effectively in a vertical direction.
Attach the mirror to the wall and press it in place

Now for the culmination of all your preparatory work – the moment of truth!
Using gloves and safety goggles, carefully place the lower edge of the mirror into the J-channel and rotate it up into the vertical position. Press the mirror firmly against the wall to squish down and spread out the mastic for maximum adhesion.
.

If you are installing several mirrors you have time to move them slightly to adjust their positions for best fit. Shim the bottoms of the mirrors so that the vertical joins line up.
Finally, engage the top clips to secure the mirror.
How long does mirror mastic take to set up?
The rate of curing for typical high-quality brands of black mastic is as follows: Approximate percent of maximum strength: @ 24 hours – 25%, @ 3 days – 50%, @ 7 days – 75% and, @ 30 days – 100%.
The curing time will depend on temperature and the amount of air to reach the mastic. For example, a 4-inch spot will cure faster than a 6-inch spot. Note that mirrors can be mounted up to 20 minutes after application of mastic and can be adjusted up to 12 hours after installation to ensure proper alignment.
Cleanup excess mastic using rubbing alcohol or acetone.
Can I hang a mirror with Command Strips?
Command strips are a patented 3-M product designed to hang lightweight (up to 16 lbs) objects on walls. They are a 2-part sticky tape with velcro-like surfaces that lock together. They are promoted as being easy to remove without damaging paint or wallpaper.
Command Strips are designed for light objects such as framed pictures: on no account should they be used for heavy, full wall mirrors.
Unique Mirror Resources from Artistry in Glass
Mirror Installation & Removal
- How to hang a wall mirror
- How to frame a builder’s grade bathroom mirror
- How to hang a frameless mirror with glue
- Best clips for hanging mirrors
- How to attach a mirror to a closet door
- How to remove a mirror glued to the wall
Mirror Repair & Restoration
- Should I resilver my antique mirror?
- Can I repair scratched mirror silvering?
- What is the best spray paint for mirror silvering?
- How to fix a cracked mirror
- How to repair a broken mirror frame
Artistry in Glass has numerous posts on the restoration of china & ceramics.
- How to repair a broken china plate
- How to repair a broken china teapot
- How to fix a broken marble slab
- How to repair a broken china coffee mug
- All about repairing stained-glass lampshades
- How to care for your stained glass skylight
- Is stained glass worth repairing?
- To repair or toss out?
- Tucson crystal & china repair a division of Artistry in Glass
- What to do with broken antiques


