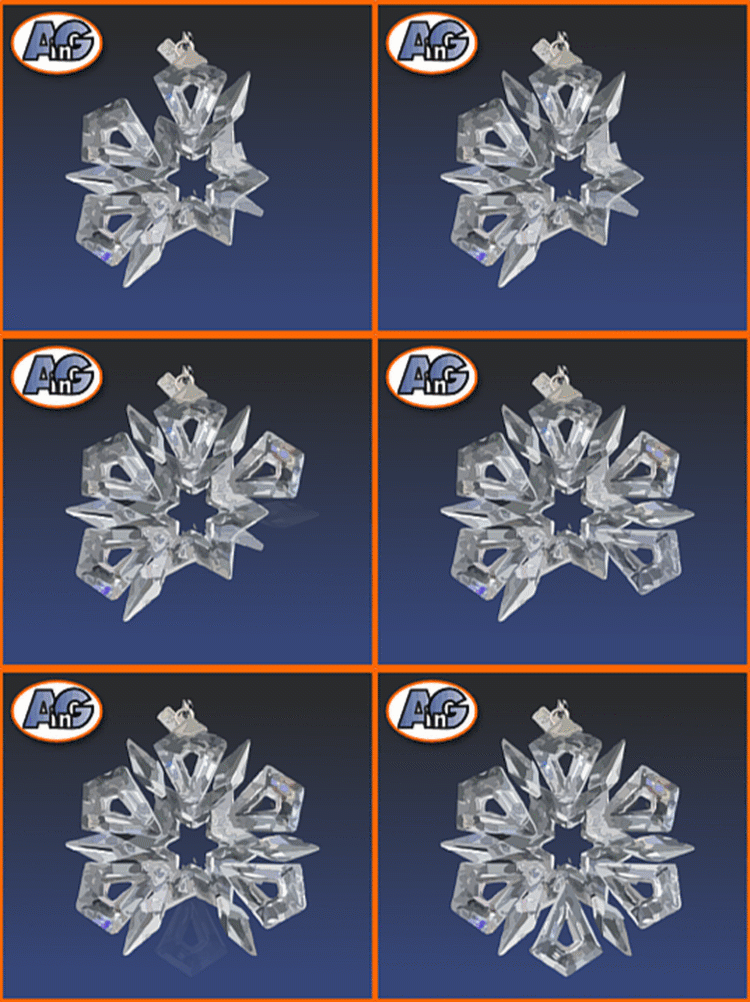
The Swarovski company has created annual ornaments every Christmas since 1991 and these snowflake and star designs have become one of their most popular collectibles. Although very beautiful, they are fragile, brittle, and easily damaged by careless handling, Learn how to repair a Swarovski annual ornament in this post from the crystal experts at Artistry in Glass.
For best results: Examine the ornament, clean off the old glue, study the facets, apply UV adhesive, setup with UV light, clean excess glue & place in sunlight for final curing.
The history of the Annual ornaments
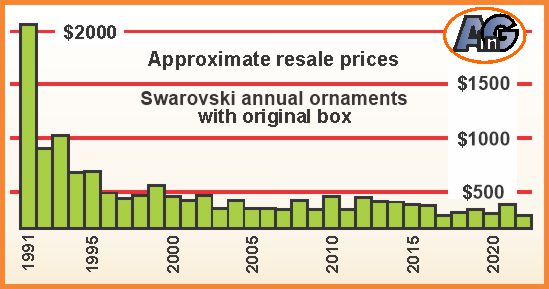
Swarovski annual ornaments, otherwise known as Christmas or snowflake ornaments were first created in 1991. This iconic first edition star now commands prices in excess of $2000 to $4000 on the resale market.
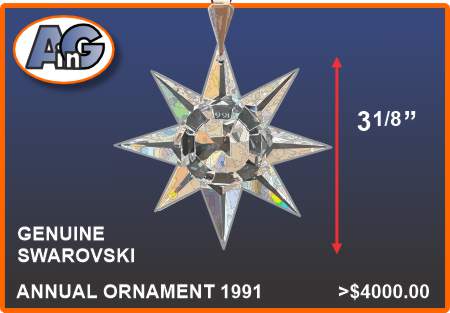
Over the years, an impressive series of designs has been created with star and snowflake themes. Collectors treasure these ornaments as family keepsakes representing sentimental memories of past Christmasses as they are displayed at holiday time.
Swarovski annual ornaments also retain a high resale value making them a sound investment.
Study this comprehensive post for all you need to know about how to collect Swarovski annual ornaments.
Artistry in Glass is not endorsed, sponsored, licensed by, or affiliated with Swarovski AG in any way. Follow this link to reach the official Swarovski website.
Before trying to repair your Swarovski annual ornament
If you have a broken Swarovski annual ornament, there are a few things to consider before attempting to fix it yourself. If the figurine is new and has a manufacturing defect, it can be returned to an official Swarovski dealer with the original box and receipt. Some repairs may also be covered under the Swarovski Collectors Society (SCS) warranty.
If the figurine is not eligible for warranty repair, ask yourself these questions:
- What is the damage? Carefully inspect the ornament to assess the damage. There are three main categories of damage: detached parts caused by failed adhesive (mostly fixable), broken-off parts (may be fixable), and chipped parts (seldom fixable).
- Is it worth fixing? Determine if the figurine is worth fixing based on its sentimental value and the cost of repair. If it is a low-value, non-sentimental item, it may be more cost-effective to replace it. For help in deciding whether it’s worth fixing consult this post from Artistry in Glass. For details on how to replace damaged ornament – jump to this link.
- Am I able to fix it? Gluing a detached crystal requires a steady hand and good hand-eye coordination. If you do not feel confident in your abilities, it may be best to leave the repair work to a professional.
If you decide to proceed with the repair, make sure to clean the ornament carefully (following the instructions in this post) before beginning.
Then follow the steps in this comprehensive post by Artistry in Glass to learn how to restore your Swarovski annual ornament.
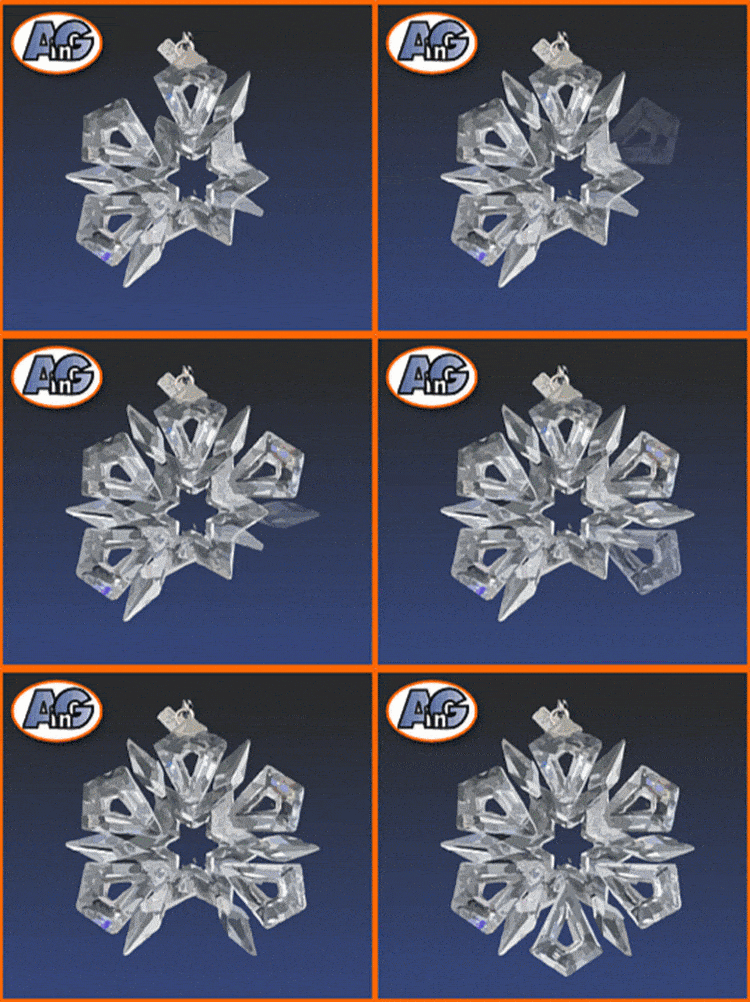
How to repair – the steps
Follow these steps for the successful repair of your broken annual ornament:
- Wash your hands
- Examine the ornament
- Clean off the old adhesive
- Study the facets
- Apply UV-activated adhesive
- Setup with UV light or sunlight
- Clean excess glue with Q-tip
- Place in sunlight for final curing
Don’t forget to wash your hands!
Always wash and dry your hands before starting any repairs – grease or dirt from your fingers can ruin the result.
As an Amazon Associate, I earn from qualifying purchases
Examine your ornament for damage
A careful examination of your ornament is essential. If you find small chips or “flea-bites” these are impossible to fix economically – the figurine cannot be restored to its original condition and it will accordingly have a reduced value.

Use an illuminated magnifying glass like this excellent one available from Amazon. This will help you to identify minor chips or flaws.
Clean off the old adhesive
The next step in fixing your annual ornament is to clean off the old adhesive. The UV glue that we are going to use is not designed to fix spaces so, to make a perfect bond, every trace of the old glue has to be removed.
We use single-edged razor blades (like these available on Amazon) to carefully cut and scrape away the glue – using a little rubbing alcohol or acetone as a lubricant if necessary. The aim is to return to a perfectly smooth planar (flat) facet like that shown below – to reglue.
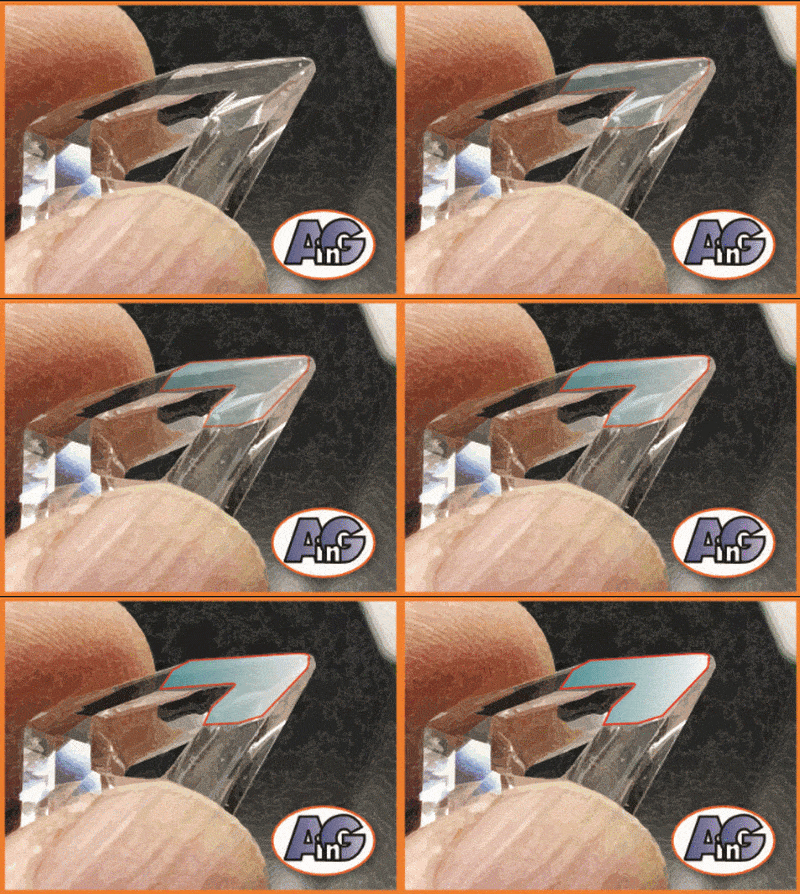
Study the facets
The second task associated with cleaning the broken facets is to figure out exactly where they have to be re-attached. In the case of the badly busted 1999 annual ornament below – these require a little detective work but the hexagonal (6-fold) symmetry helps greatly to line up the pieces.

After the detective work, we mark each facet with tape or, if there are only one or two, memorize their positions before cleaning off the old glue.
Apply the UV adhesive
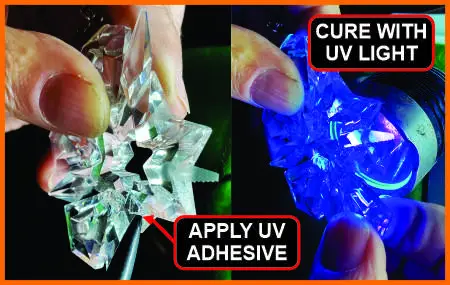
This is the hardest and most crucial step. Getting the position – (the angle and direction) exactly correct. So, do a dry-run – practice holding the pieces in position. Breathe deeply and keep calm to stop your fingers from trembling. /
Once you are confident that you have the correct positioning, separate the pieces and apply a small dab of UV adhesive and place the two pieces together.
Setup with UV light or sunlight
Now for the fun part – this is like Tiger Woods taking the driver at the road hole at Saint Andrew’s – UV glue sets up in an instant – it’s all or nothing!
If you are confident that the pieces are in the correct position, apply the UV light (with an assistant if necessary), or remove the shading, and allow sunlight to set up the glue. It only takes a second or two.
If you discover that the positioning is crooked – act quickly and use a little force or a blade to separate the mis-glued pieces before they are firmly cured- then clean off the glue and start all over again.

Using the positions marked with tape AND the distinctive hexagonal symmetry, we glue the loose pieces back one by one.
Clean off excess adhesive
With practice, you will figure out that a very small blob of glue is all that is needed. If you use too much and it splodges out over the edges, use a fine Q-tip with or without rubbing alcohol to clean of the excess before it hardens.
Place in sunlight for final curing
Once you are happy that all pieces are in the correct positions, we recommend that you place the completed repair in full sunshine to complete the setting up or curing.
UV-activated adhesives
In the past 20 years, significant progress in adhesive technology has transformed the process of bonding glass. Among the various innovations, the most notable one is the development of UV light-cured adhesives.
Contemporary UV-activated glues are transparent, durable, resistant to discoloration, and, importantly, cure rapidly. This quick setup time is particularly advantageous in the delicate task of positioning fragile crystal elements precisely.
In an upcoming post, we will detail our preferred UV glues. For now, here are our recommendations for fixing Swarovski crystal figurines:
Bondic UV liquid plastic welder
This inexpensive UV kit is very handy for the amateur wanted to fix one or two figurines. It combines a fine needle dispenser of glue with a built-in UV light. The small size makes it easy to use.
Refills are rather expensive but a single cartridge is sufficient to fix several crystal figurines. Although the adhesive is not as strong as the professional types (see below) it is plenty strong enough.
Professional UV-activated glue
If you plan to repair a lot of glass and crystal, we recommend using a professional-grade adhesive from CR Lawrence. This company’s adhesives come in three viscosities, high (thick), medium, and low (runny).


We prefer using the thickest (high viscosity) type of adhesive for most simple Swarovski repairs because it kind of “grips” loose crystals and keeps them in place for a few seconds before curing.
One of the significant advantages of the CRL range of adhesives is their high quality and reliability. Unlike many competing brands that arrive with dried-up glue, CRL adhesives come in black, light-resistant bottles.
To cure the CRL glue, you need to purchase a UV lamp such as the one recommended by Artistry in Glass on Amazon, or you can rely on sunlight.
It’s essential to note that these CRL adhesives will not harden when applied to the surface. Instead, they set up when applied to the minuscule gap between two pieces of crystal. This non-curing characteristic makes cleaning the surface a breeze with a Q-tip. (Innovative artisans can attain a glossy UV glue surface by placing a clear cellophane or acetate film over the glue before exposing it to UV light).
Conclusion
Many older Swarovski annual ornaments come apart because the old glue dries up. If you have steady hands and good coordination you can make a broken Swarovski annual ornament look as good as new – without sending it out for professional repair.
If you doubt your abilities please feel free to consult the experts at Artistry in Glass – call 520-320-0104
Artistry in Glass: your source for antique repair in Tucson
Check out these informative articles:-
- Where can I get antiques repaired?
- Are broken antiques worth fixing?
- How to fix a broken picture frame
- How to repair a broken china plate
- How to repair a broken china teapot
- How to fix a broken marble slab
- How to repair a broken china coffee mug
- How to repair a 2000-year-old sculpture
- All about repairing stained-glass lampshades
- How to care for your stained glass skylight
- How to repair Dalle de Verre
- Is stained glass worth repairing?
- To repair or toss out?
- What to do with broken antiques
- Is lead crystal dangerous?
- Repairing an antique Mexican statue
- Repairing religious statues
- The history of Swarovski crystal figurines
- How to find the value of a Swarovski Crystal figurine
- Have Swarovski figurines lost value since 2009?
- How to collect Swarovski annual ornaments
- How to display Swarovski crystal figurines
- How to authenticate a Swarovski crystal figurine
- How to display Swarovski annual ornaments
- How to clean Swarovski crystal figurines
- How to repair a Swarovski crystal mouse
- How to repair a Swarovski annual ornament
- How to repair a Swarovski crystal train set
- Fixing broken wine glass stems
- How to clean cloudy glasses
- Why do wine glasses have stems?
- Swarovski Crystal Figurines
- How to repair a chip in a wine glass
- How to fix a scratched glass tabletop
- How to replace a broken patio tabletop

